
Are you looking to upgrade your kitchen sink? If your current sink is outdated, damaged, or simply not meeting your needs, it may be time for an undermount sink replacement. While this may seem like a daunting task, a DIY (Do It Yourself) sink replacement is not as difficult as it may seem. With some basic tools and a little know-how, you can easily upgrade your kitchen with a new undermount sink.
Replacing an undermount kitchen sink involves several steps, but one of the most important is ensuring a proper seal. Without a watertight seal, your new sink can leak and cause damage to your kitchen. Upgrading the kitchen sink not only adds aesthetic value to your kitchen but also makes your kitchen more functional. Therefore, in this step-by-step guide, we will show you how to replace and seal an undermount kitchen sink, so you can enjoy a beautiful and functional new sink for years to come.
So, let’s get started on your DIY sink replacement journey!
Replacing an undermount kitchen sink is a fairly straightforward process. First, the old sink needs to be removed, which involves disconnecting the plumbing and unscrewing the clips holding the sink in place. The new sink is then installed, and the sink is secured with clips and sealed with caulk or silicone sealant. Finally, the plumbing is reconnected, and the sink is ready to use.
Tools and supplies you need
Replacing and sealing an undermount kitchen sink is not a simple task, but with the right tools and supplies, it can be done easily and effectively. In this guide, we’ll go over the essential sink installation tools and kitchen sink replacement parts you’ll need, as well as the importance of taking accurate measurements of your sink size and dimensions.

Sink Installation Tools:
One of the most important things you’ll need for your undermount sink replacement is the proper sink installation tools. These tools include a drill, a jigsaw, a screwdriver, a level, a putty knife, and a caulking gun. With these tools, you’ll be able to remove your old sink and install your new one with ease. Additionally, a level is crucial to ensure that your new sink is perfectly level and won’t cause any problems with draining.
Kitchen Sink Replacement Parts:
In addition, to sink installation tools, you’ll also need some kitchen sink replacement parts. These parts include mounting clips, which securely hold the sink in place, and a strainer and drain assembly. Make sure to choose the correct size and style of the strainer and drain assembly to fit your new sink.
Sink Size and Dimensions:
Before you begin your undermount sink replacement, it’s important to take accurate measurements of your sink cutout and sink size. This will ensure that your new sink fits properly and will not cause any problems with your countertop. Measure the width and length of your cutout, as well as the depth of your new sink, to ensure a perfect fit.
By having all of the necessary sink installation tools and kitchen sink replacement parts on hand and taking accurate measurements of your sink size and dimensions, you’ll be well on your way to completing your DIY sink replacement project. With these tips and tools in mind, you can upgrade your kitchen with a beautiful and functional new undermount sink.
How to remove the old sink
Before you can install your new undermount kitchen sink, you’ll need to remove the old one. This can be a challenging task, but with the right tools and knowledge, it can be done easily and efficiently. In this guide, we’ll walk you through the steps for disconnecting the plumbing, removing sink adhesive, and dismantling the old sink.
Disconnecting the Plumbing:
The first step in removing your old sink is to disconnect the plumbing. This involves turning off the water supply, disconnecting the water lines, and removing the drain assembly. Make sure to have a bucket or towel on hand to catch any water that may still be in the pipes.
Removing Sink Adhesive:
Once the plumbing is disconnected, you’ll need to remove any adhesive or caulk holding the sink in place. Use a putty knife to gently pry the sink away from the countertop, taking care not to damage the countertop itself. If the sink is attached with clips, you’ll need to remove them as well.
Dismantling the Old Sink:
With the sink adhesive and plumbing disconnected, you can now dismantle the old sink. Carefully lift the sink out of the countertop and set it aside. If you’re planning on reusing the old sink, be sure to set it somewhere safe and secure.
Once the old sink is removed, you can now prepare the area for the installation of your new undermount sink. This includes cleaning the area thoroughly and making any necessary repairs to the countertop. With these steps, you’ll be well on your way to installing your new undermount kitchen sink.
How to install the new sink
Once you’ve successfully removed your old undermount kitchen sink, it’s time to install your new one. This process can seem daunting, but with the right tools and knowledge, it can be done easily and efficiently. In this guide, we’ll walk you through the steps for undermount sink attachment, securing sink clips, and plumbing connection for the new sink.
Undermount Sink Attachment:
The first step in installing your new undermount sink is to attach it to the countertop. Begin by applying a bead of silicone adhesive around the edge of the sink cutout on the underside of the countertop. Carefully lower the sink into place and press it firmly against the countertop to ensure a secure attachment.
Securing Sink Clips:
Once the sink is attached, you’ll need to secure it in place using sink clips. These clips hold the sink firmly against the underside of the countertop and prevent it from moving or shifting over time. Attach the sink clips to the sink’s lip, then tighten them down onto the countertop using a screwdriver.
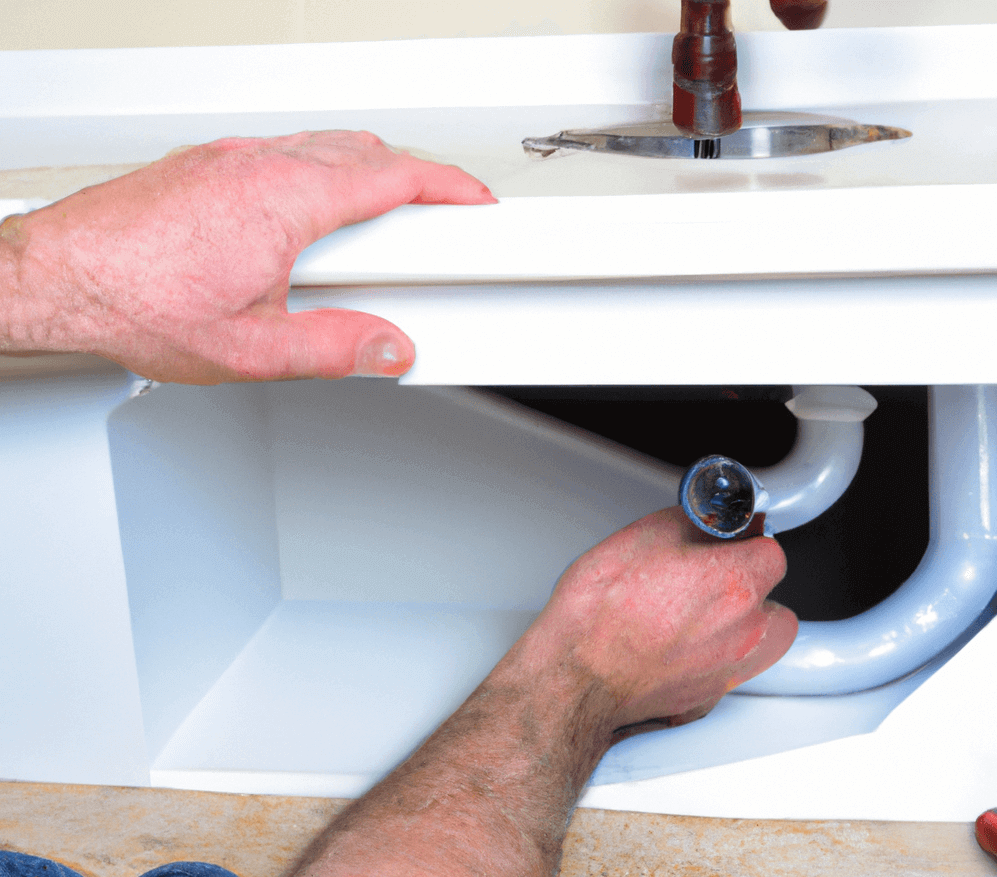
Plumbing Connection for the New Sink:
With the sink securely in place, it’s time to reconnect the plumbing. Begin by installing the new drain assembly and attaching the water lines to the faucet. Make sure to tighten all connections firmly to prevent any leaks.
Once the plumbing is reconnected, turn on the water supply and check for any leaks. If everything looks good, you’re ready to enjoy your new undermount kitchen sink!
How to seal the new sink
After you have successfully installed your new undermount kitchen sink, it’s important to properly seal it to prevent water and other liquids from seeping into your countertop. Here’s how to seal your new sink:
Clean the Sink and Countertop: Before applying any sealant, make sure both the sink and the countertop are clean and dry. Use a non-abrasive cleaner and a soft cloth to wipe down the sink and countertop.
Apply the Silicone Adhesive: Once the sink and countertop are clean and dry, apply a bead of silicone adhesive around the edge of the sink where it meets the countertop. Be sure to use a high-quality silicone adhesive that is designed specifically for use with undermount sinks.
Smooth the Sealant: After applying the silicone adhesive, use a smooth, flat tool such as a putty knife or a caulk smoothing tool to smooth out the sealant and remove any excess. This will ensure that the sealant is evenly distributed and provides a tight, waterproof seal.
Let the Sealant Dry: Allow the silicone adhesive to dry completely according to the manufacturer’s instructions before using the sink. This will usually take between 24-48 hours, depending on the type of sealant used.
Check for Leaks: After the sealant has dried, check for any leaks by filling the sink with water and letting it sit for a few hours. If you notice any leaks, use a caulk gun to apply an additional sealant to the affected area and allow it to dry again.
Finishing touches
After you have successfully installed and sealed your new undermount kitchen sink, it’s important to perform some finishing touches to ensure that the sink is fully functional and there are no leaks. Here are some steps you can take to complete the installation process:
Test the Sink Functionality: Turn on the water and test the sink’s functionality to ensure that it is working correctly. Check the water pressure and make sure that the sink drains properly. If you notice any issues, troubleshoot the problem by checking the plumbing connections and ensuring that the sink is properly installed.
Check for Leaks: Inspect the area around the sink and countertop for any signs of water leaks. If you notice any leaks, check the sink’s connections and reapply the silicone adhesive as needed to create a watertight seal.
Troubleshooting Tips: If you encounter any problems during the installation process, there are a few troubleshooting tips you can try. For example, if the sink is not sitting level, adjust the sink clips to level it out. If the sink is clogged, use a plunger or a drain snake to clear the blockage.
Clean Up: After completing the installation process, clean up the area around the sink and countertop. Wipe down any excess silicone adhesive or other debris, and dispose of any old sink parts or packaging materials.
Conclusion
Replacing and sealing an undermount kitchen sink can be a challenging but rewarding DIY project that can upgrade the functionality and appearance of your kitchen. By following the steps outlined in this guide and using the proper tools and supplies, you can successfully remove and install a new sink, creating a watertight seal that will prevent leaks and promote efficient drainage.
Remember to regularly maintain your new sink by cleaning it properly and promptly addressing any issues that arise, such as leaks or clogs. And, if you notice signs of wear and tear, such as rust or cracks, it may be time to consider a sink replacement. With these sink replacement tips and kitchen sink maintenance techniques, you can keep your kitchen sink in top condition for years to come.